This is the place where I'm sharing my positive experience in fixing something and doing small projects, or any other information that I've found useful for myself.
Recently, I've been trying to find a solution to lock my balcony door in a slightly open position to let fresh air in, while at the same time preventing the door from opening wide.
All the hardware I saw in the stores and online sucked in one way or another (in terms of fitting the idea I had in mind), so I ended up carving the thing from a cheap Ikea cutting board. With under $2 budget, I now have two venting modes, and I could make at least 10 more of these form the leftover material ))
The original mast broke, and after searching on many websites for either aftermarket mast or OEM replacement mast, it was apparent that one does not exist (or at least is really hard to find). Even though you can see a replacement mast for $30+ on OEM parts websites, after confirming with a VIN number they tell that the only option is getting a whole new assembly for over $200. The reason might be that this particular mast doesn't have teeth on the white plastic wire. Instead, there is a plastic bump on the end, and the wheel inside the antenna assembly grabs this wire by that bump, so replacement masts might not be available just because of the complexity of the replacement process.
Anyway, I grabbed the cheapest available mast that looked as close as my original one on eBay for $11, it was designed for 94-98 Saab 900 if you are curious.
My first problem was that the old mast broke inside, and I couldn't get it out, so I just cut the aluminum tube of the power antenna in half with a saw. I got all the junk out the tube and inserted the short piece of tube from my new mast, it fit perfectly:
Then I had to cut all the teeth with utility knife since otherwise the cable didn't fit into the groove of the wheel inside the power antenna:
I then used a piece of sandpaper and the existing clamp that's holding wire harness to put pieces of the aluminum tube back together (Hint: draw a straight line along the tube with a black marker before you cut it, otherwise you'll need to spend some time aligning it when you put it back into your car):
Note: teeth aren't cut yet on this picture, this was a test install
Now comes the hardest part: adjusting the length of white wire and up/down switch mechanism. There's a small white wheel that rotates with each half-turn of a big wheel, and it turns a metal plate that connects/disconnects 3 metal contacts for up/down motor movement. You have to cut the white wire so that the contact for going down disconnects just when the antenna fully retracts (Note that there is a moving part inside the big white wheel, it's needed to keep moving to disconnect the contact after antenna is fully retracted, keep that in mind when you're figuring where to cut your wire). This determines the length of your wire up to a half-turn. You can leave it like this or you can cut off several additional half-turns by fully extending your antenna and seeing how many wire you have left.
I had to affix the bump to the end of the wire and install it into the big wheel several times while adjusting the length (you need to make a hole at the end of the wire to insert that metal piece):
Your antenna motor now disconnects after fully retracting. At this point we need to make it stop after it fully extends. Unfortunately, when I fully extended my antenna, there was still contact with the metal on the ring, meaning that the motor will keep trying to pull the antenna up, eventually breaking the wire or failing. So I had to cut a piece of the ring to make the motor stop. I cut it such that the contact plate slides off the ring with the last turn before being fully extended. That means that my antenna will never be fully extended, but that's just about one inch so I don't care.
Now you can bench-test your antenna with a drill battery or in your car. Black wire connects to negative battery terminal (Ground). Yellow/red wire should be constantly connected to positive terminal. With such a connection, antenna fully retracts and stops. If you, in addition, connect green wire to positive terminal, antenna will fully extend and then stop (power is supplied to this wire when you turn your radio on).
Here is the video of my tests:
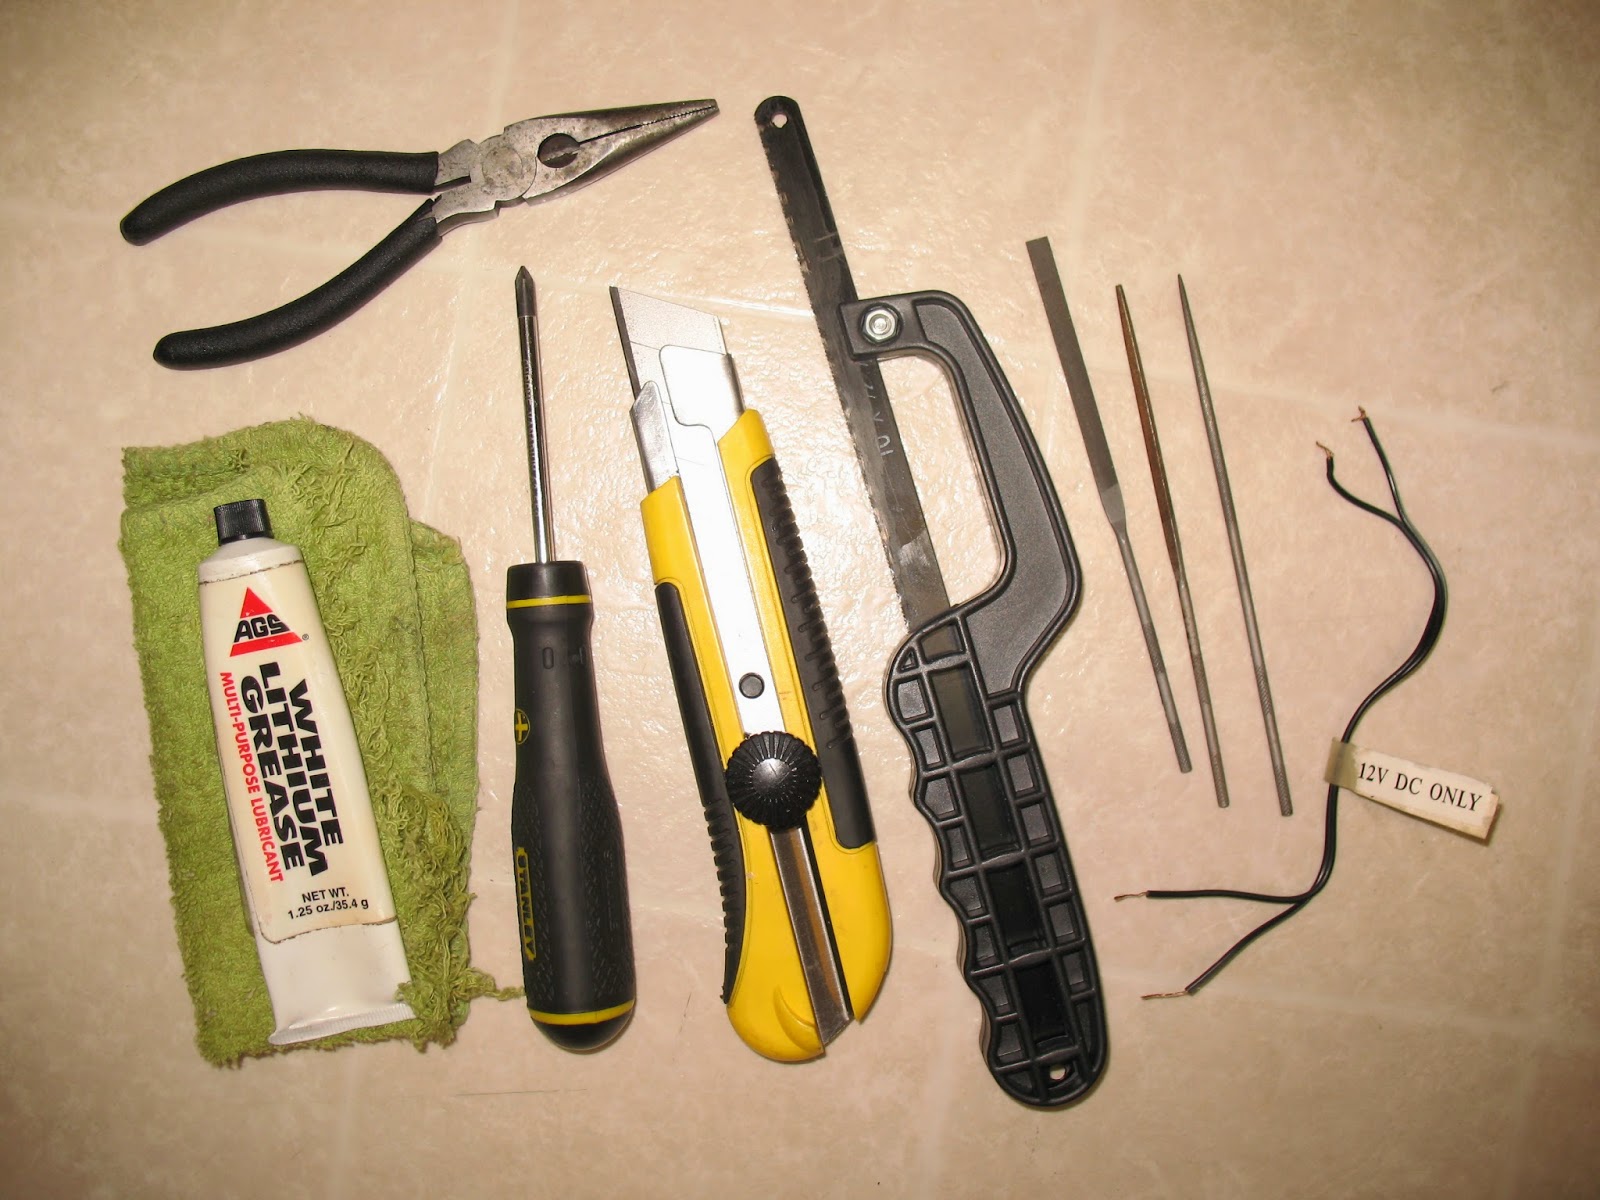
Aside from a piece of sandpaper, a drill battery, and an awl to make that hole in the wire, I used the following tools:
and this is the leftover junk :)...
Hope that helped, and if you have any questions, feel free to ask.
I asked myself this question when my old hair clipper became dull, and didn't cut hair all that well anymore. How could it be if the clipper was advertised as having self-sharpening blades, i.e. the blades should sharpen themselves while in operation? I even thought of getting rid of it since I didn't find any replacement blades online.
Still, I was curious about that self-sharpening feature. Does it really work? A quick Internet search revealed that it works ONLY if you keep your blades clean, and lubricate them with the special clipper oil. This gave me a hope, so I ordered a bottle of clipper oil on Amazon for under $3, and here is what I did:
Took the blade module apart;
Cleaned it with rubbing alcohol;
Put a few drops of oil on the blades;
Assembled the module back together;
Left the clipper running for a couple minutes to let the blades self-sharpen.
I tried it in action and to my amazement it was as good as new. For under $3 dollars and about 10 minutes of my time, this was the easiest fix ever. Not to mention that given the size of the oil bottle, it should last me a lifetime.
Recently I bought some storage space from Google in an effort to finally move everything to the cloud so I don't have to worry about my data being lost anymore. Well, one part of the job was to sync the pictures and videos from my camera between Picasa and Picasa Web Albums. One of the syncing options was to "Sync Photo Order", and of course I wanted my pics to be chronologically ordered. However, when I started to review them, I noticed that most of the video files were in the wrong places even after sorting a folder by date in Picasa. This was weird because if you open that same folder in Windows 7 and sort by the 'Date' column in detailed view, everything looks nice.
It turned out that the actual date&time is stored in a tag inside an avi file, much like Exif is used to store time stamps in JPEG's, and apparently Picasa doesn't recognize it. Instead, it sorts by the file creation date&time which unfortunately had been screwed up on my computer for some reason. So I needed a way to extract the actual time from a tag inside an avi file, and write it in the date&time attribute of a file. Of course, I didn't want to do it by hand. After some research I found a wonderful command-line tool, ExifTool, which, after several hours of reading the manual )), does exactly what I needed. It takes the data from the tag and writes it into file's attributes. Here is the command line that I wanted to share with anyone who has the same problem:
About a month ago, I started having power problems with my HP dv7 laptop. My first thought was that the power jack got loose over time since the problem seemed to correlate with the power plug being touched. Then I noticed that even if the battery wasn't charging, the LED mounted in the power jack would light no matter how I change the position of the plug inside the jack. Only the brightness of the LED had been changing a little bit. The other symptom was that the laptop would stop charging the battery while experiencing high loads. This led me to another assumption that the power adapter was probably dying and didn't provide enough power anymore. Unfortunately, when I tested my laptop with another power adapter, it worked perfectly for several hours which finally confused me.
I cut my power adapter apart in a brutal way, but everything looked nice inside. I tested all the capacitors with my multimeter and again everything was fine. I even dropped it on a concrete porch which we call "hit repair" in Ukraine :)
I ordered a replacement power adapter on eBay, but it didn't help a bit. All the symptoms remained almost the same. This is when I found lots of different forum posts and product reviews on Amazon/eBay where people were complaining that the new power supplies didn't fix their problem. Most interestingly, the number of complaints for the original hp chargers was no less than for the cheap alternatives.
Finally, I decided to disassemble my laptop to check the jack. I found very nice disassembly manual here, which helped me to get to the jack pretty fast:
The jack with the built-in LED
I disassembled the jack itself to see if anything were loose inside:
It turned out that HP didn't bother soldering all the metal leads to the wires which means that you get a 50% less reliable connection.
This whole part wasn't connected to anything!
Short piece of black wire provides the ground for LED
Taking apart the power jack is not necessary unless you want to bend the leads a little bit to improve connection.
Now, the root of my problem:
The negative wire from the motherboard doesn't even touch the lead
This has explained all the strange behavior of the laptop. While the negative LED wire was still soldered to the lead, the negative wire from the motherboard broke off of this same lead and was just merely touching it. I decided to solder the wires back to all the leads available to increase reliability:
(UPDATE: some of you were asking me how to figure out which wires go to which leads in the case you have many broken wires, so I'll try to explain how to connect them back. You should have six wire ends on the jack side and four on the motherboard side. The reason for that is two black ends are from a short piece of wire connecting negative LED lead to a negative jack lead (you can see it on the 5th from the top picture that I recently added). Now look at the 3rd from the top picture. You should have yellow (left) and black (right) wires connected to LED (very top of the jack). Make sure to check that you connect short black wire to LED, and not the one that goes to the motherboard (you might need to unwrap the tape a bit to the point where the short wire loops back to identify it). The remaining two black ends must be connected to a negative lead. Negative leads connect to the outer ring of the plug. There are two of them, and one is unused (as I mentioned above), it's the top left lead with the round hole that you can see on the same 3rd from the top picture, you can solder your two black wires there, or you can use the one that's symmetrically located on the right side to which the black wires were originally soldered at the factory, or both for reliability. Red wire can be soldered to another unused lead, the one with the round hole in the middle of the jack on the picture, or the original lead to the bottom-right of the unused one. These two leads connect to the inner ring of the plug. Finally, white wire should be soldered to a lead located in the bottom-left area of the jack. This connects to the center pin of the plug. If you don't want to mess with soldering, you might consider ordering the whole assembly jack+cable from a place like eBay.)
Moreover, I took the opportunity to clean the heat sink (I circled the area where it's not cleaned yet):
Having cleaned the heat sink dramatically decreased the heat from the laptop and the noise from the cooler. In fact, it looks like it wasn't functioning at all before cleaning.
Overall, my laptop is working again without any power related problems. I saved on a new jack, and, what's funny, my original power supply survived all the tortures to which it was subjected!
 Recently, I've been trying to find a solution to lock my balcony door in a slightly open position to let fresh air in, while at the same time preventing the door from opening wide.